The following are instructions for assembling the Box. Prior to starting these instructions, you need to have the wood pieces cut and drilled as shown below:

Tools Required
- Wood Glue
- Clamps
- (optional) Router with Roundover Router Bit
- (optional) Random Orbital Sander
- Paint or Stain and Polyurethane
- Paint Brushes
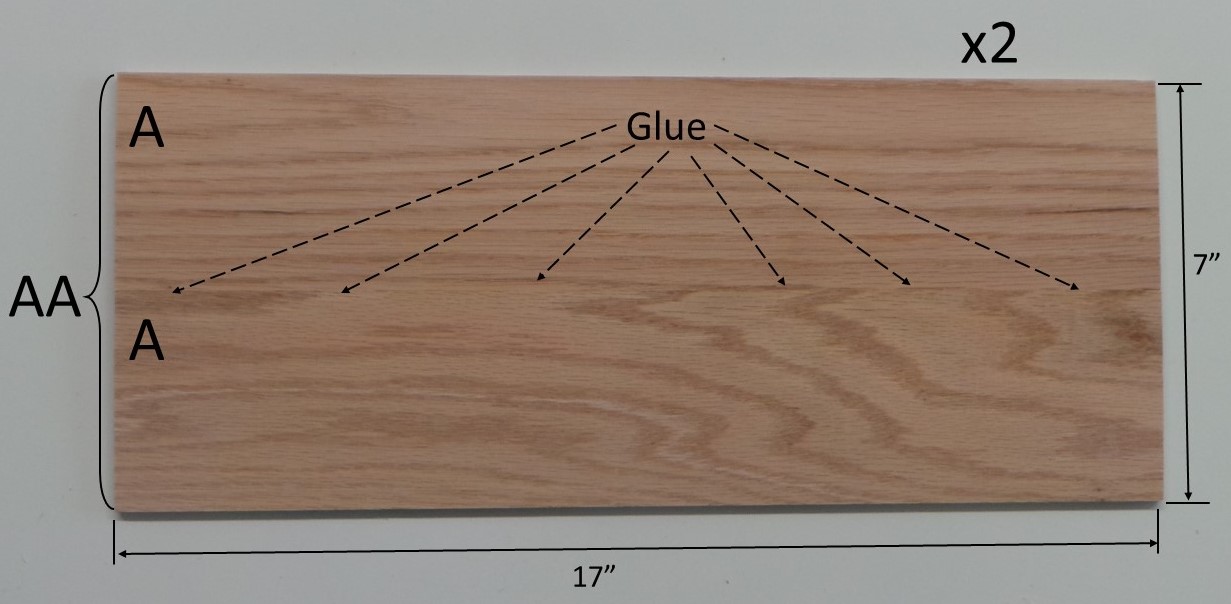
Step 1: Make Sides from “A”
Glue 2 of “A” board edge-to-edge to make a board 17″ x 7″. Use clamps to hold the boards together until the glue dries. Do this twice. These will be the Left and Right sides of the box. We will call this “AA”.
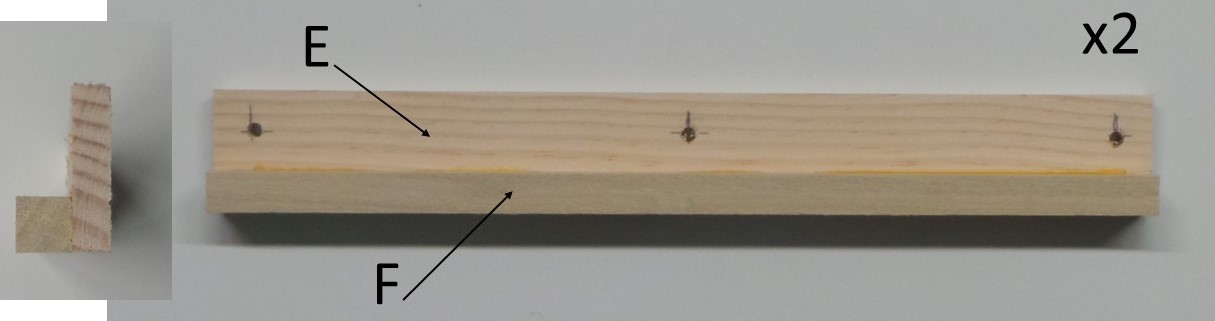
Step 2: Glue Lamp Holder Supports
Glue “E” to “F” as shown below. The Square Dowel will give added strength when the piece is glued to the box. This is “EF”. These pieces will be used to support the Lamp Holders.
Step 3: Glue Pieces to Side Boards
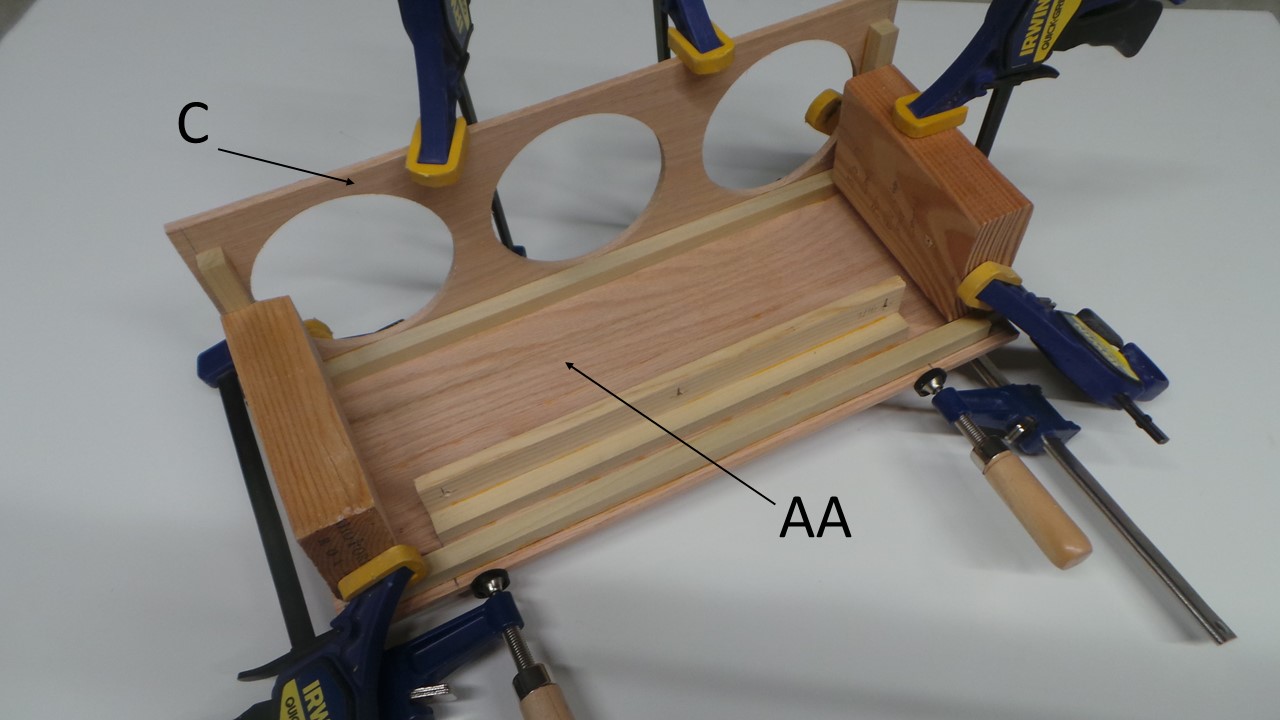
- Glue the Lamp Holder Support “EF” to the side board “AA”. The edge of “E” needs to be 5″ from the edge of “AA”. Make sure that “F” is facing the closer edge of “AA” (approximately 1″ to 1-1/8″ from edge), and that “EF” is centered lengthwise on “AA”.
- Glue 2 “G” pieces 1/4″ from each long edge of “AA”. Use a pencil and the edge of “B” or “C” to draw a line 1/4″ from the edge. Make sure that “G” is centered with the edge.
- Glue 2 “H” pieces 1/4″ from each short edge of “AA”. Make sure that “H” is centered with the edge.
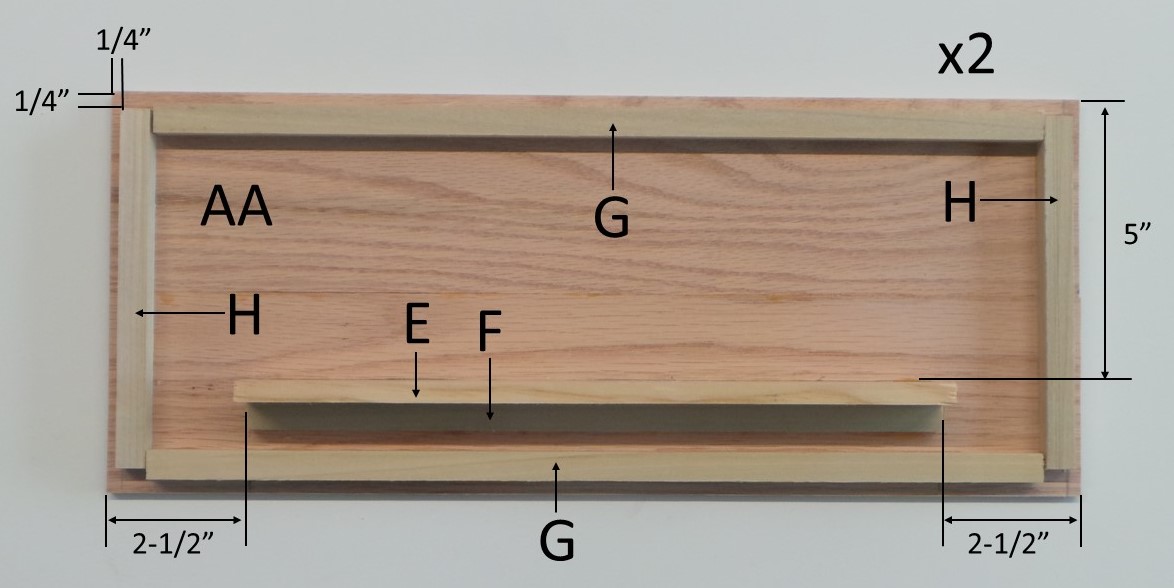
The final “AA” with “EF”, “G”, and “H” glued is shown below.
Step 4: Glue Pieces to Front Board
Glue 2 “J” pieces 1/4″ from each short edge of “C”. Make sure that “J” is centered with the edge.

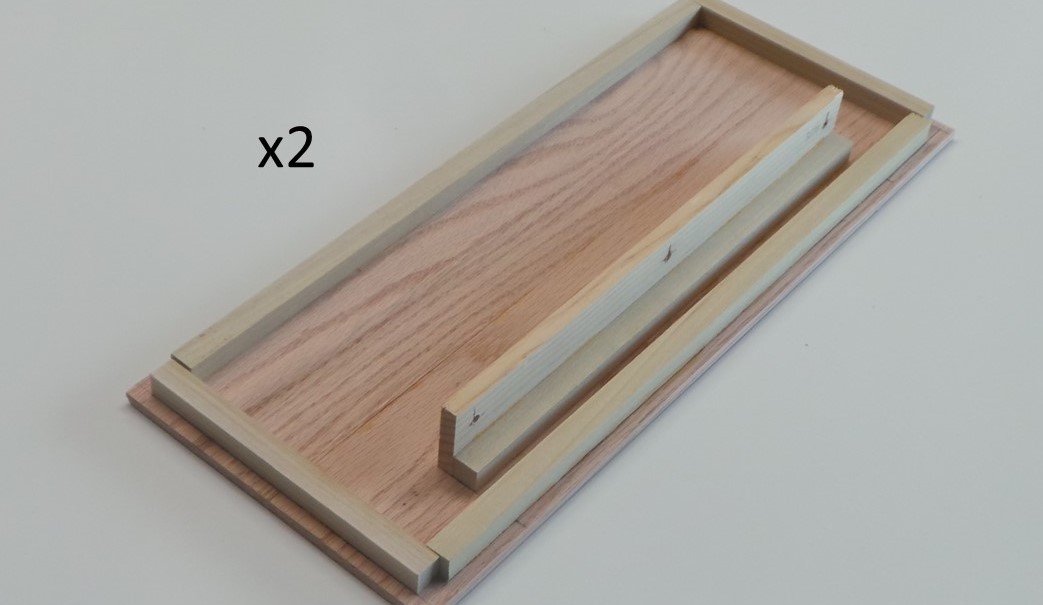
Step 5: Glue Front and Side
Glue the front board “C” to one of the side boards “AA”. Make sure that Lamp Holder Support “EF” is on the far side from the front board “C”. Use clamps to secure boards, and use blocks with square corners to keep the joint at a right angle.
Step 6: Glue Top and Bottom Boards
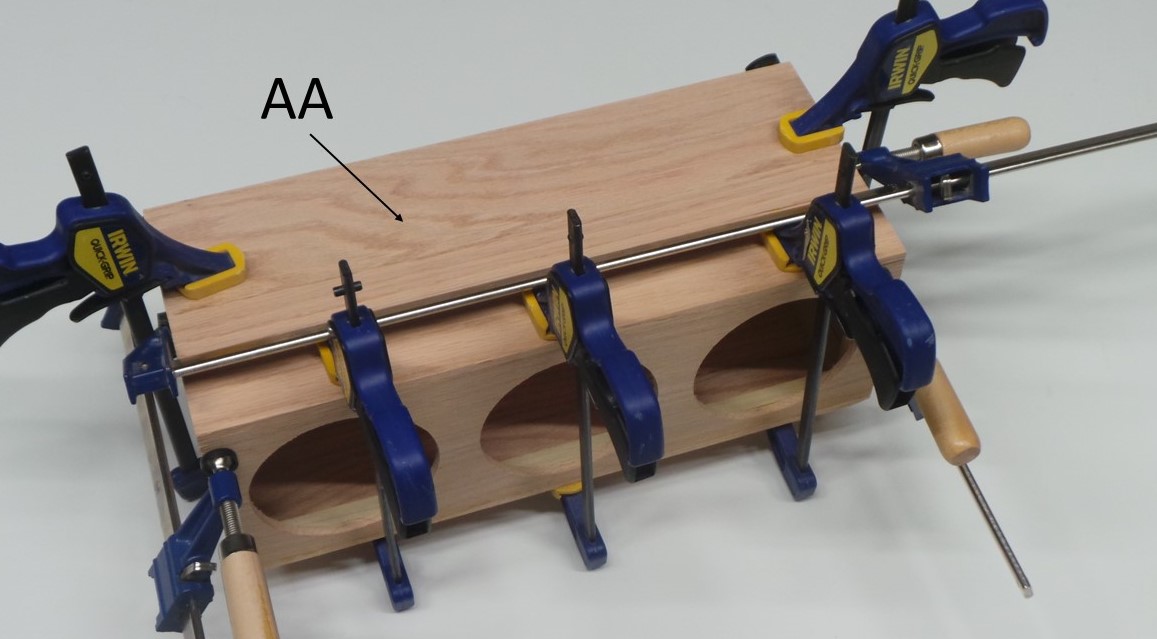
Glue top and bottom boards “D” to assembly. Secure with clamps.

Step 7: Glue Second Side Board
Glue second side board “AA” to assembly. Make sure that Lamp Holder Support “EF” is lined up with the other side.
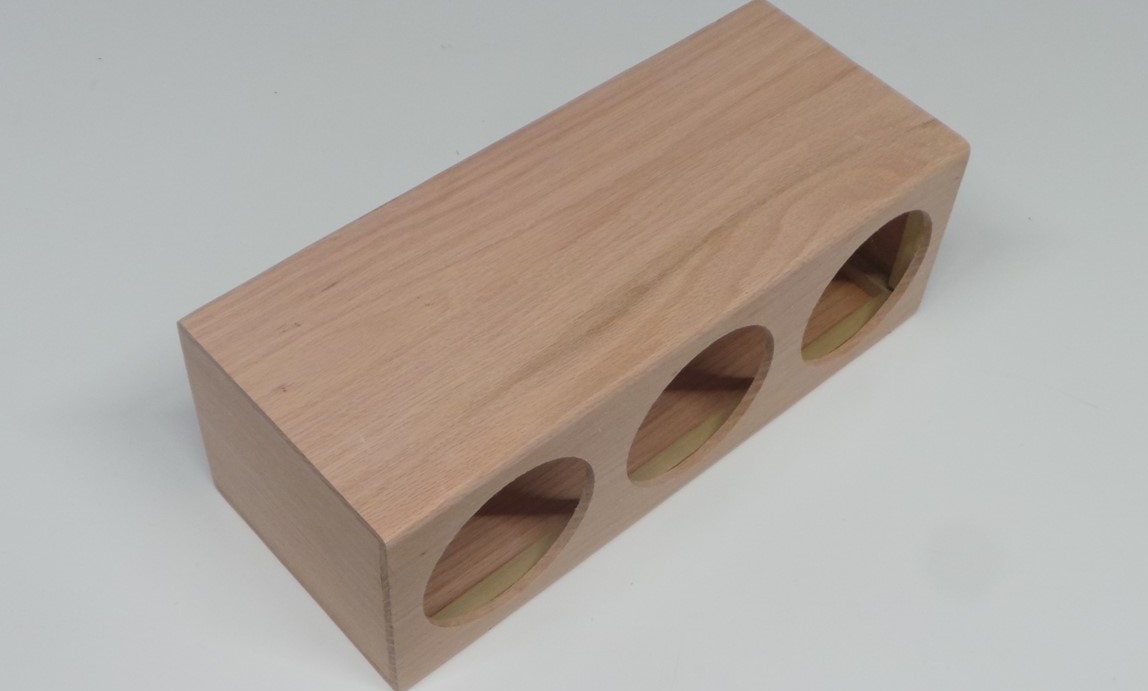
Step 8: Route Edges
If desired, use a Router and a 1/8″ Roundover Bit (or any other desired router bit) to smooth or add a pattern to the edges. It is recommended to route all edges except for the ones on the “D” piece that will be the bottom of Timing Light.

Step 9: Sand
If desired, use a Random Orbital Sander to sand all sides of the box smooth. This is especially important if any wood glue seeped out of the joints and onto the sides. The Stain will not absorb well if there is any wood glue on the surface.

The Routed and Sanded box will look something like below.
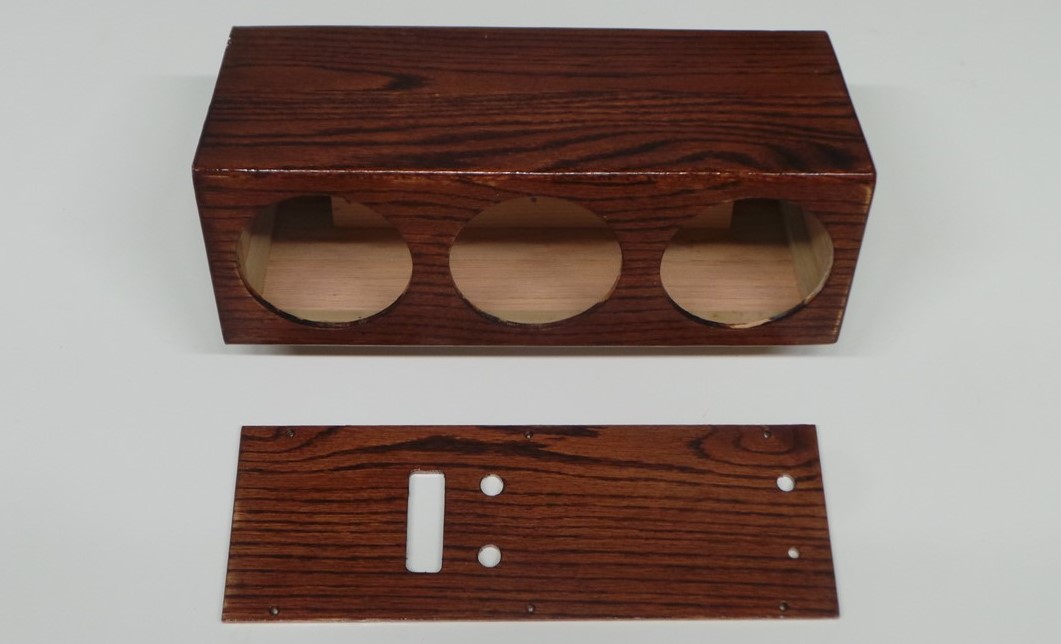
Step 10: Stain and Polyurethane
If desired, use Stain and Polyurethane to to finish the box. I prefer to use 1 coat of stain, and 4-8 coats of polyurethane. Refer to manufacturer’s instructions. A light sanding between coats of polyuruthene typcially gives the smoothest finish in the end.

The assembled and finished box will look something like below.
Next: Electronics
